Pasi's Grow Log 2026

Pasiasiainen

Well-Known Member
Joined
Jun 28, 2025
Messages
99
Points
53
Location
Finland
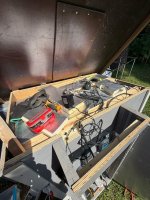
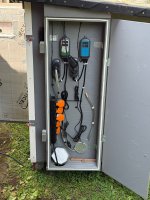
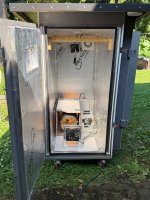
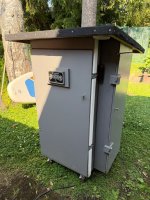
Set up my flue-curing chamber today.

I remove all the electronics for the winter since I store the cabinet outside. After a few test runs, I'll be all set for the first batch of Samsun.
While setting everything up, I realized I had changed my phone since last summer, and all my pre-programmed flue-curing schedules in the Inkbird app are gone. I don't know if there's a way to transfer them, but I completely forgot to check.
Looks like it'll (again) be a PITA to recreate all those programs.

IMG_1297.jpg IMG_1316.jpg IMG_1317.jpg IMG_1319.jpg
 

Pasiasiainen

Well-Known Member
Joined
Jun 28, 2025
Messages
99
Points
53
Location
Finland
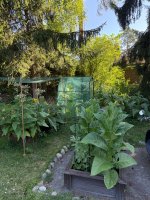
Day 60 after transplanting.

It looks like this season won't turn out to be quite as miniature as I feared.
Some of the plants will remain smaller than I'd hoped, but others have grown really fast now that nearly all of them are approaching flowering.

Samsun Maden (top of the flower head): 155 cm (5'1")
Corojo 99: 135 cm (4'5")
CT Shade: 165 cm (5'5")
Dominican Olor (unopened flower head): 170 cm (5'7")
Piloto Cubano (unopened flower head): 140 cm (4'7")
Little Dutch (topped already): 60 cm (2'0")

Patch17-7-2026.jpg

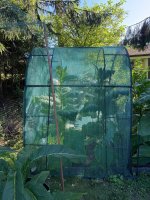
I only have about 20-30 cm of headroom left in my shade structure, and CT Shade isn't showing any signs of budding yet, and is growing like crazy. @The Haroo ln warned me about this :). There are still 15-20 days until maturity. We'll see if I have to raise the structure. I can raise it by another 40 cm, but I'm a bit worried that I might damage the plants while doing so.

CTShade17-7-2026.jpg

Question: Can I top CT Shade before they start budding, just in case they grow too tall for the shade structure, or would that negatively affect leaf quality?

------

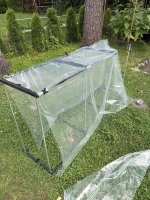
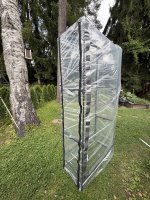
Since I'm planning to color-cure my leaves in my small boiler room - where I have a nice, steady temperature of about 28°C (82°F) - I built a larger plastic "greenhouse" to maintain humidity. Last year I used a small store-bought plastic greenhouse, but it was a bit too small, so I built a larger, custom one using parts from that greenhouse and it is now now a bit over 2 m in height. I used 16 mm aluminum tubing, clear plastic sheeting, duct tape and plastic wall zippers.

I still need to come up with a way to hang the leaves so that I can easily add more leaves as they're primed.

Curing-greenhouse.jpg Curing-greenhouse2.jpg

Things are looking pretty good.
 

Pasiasiainen

Well-Known Member
Joined
Jun 28, 2025
Messages
99
Points
53
Location
Finland
If I build it by myself and make wooden frame what plastic cover I should use?
I think those Puuilo/Motonet etc. mini greenhouses are made out of somekind of vinyl that is pretty thick. I could not find anything like that, so I just used the thickest protective plastic that I could find. Bought mine from Jula. It is not super thick, but feels like it won't puncture or tear that easily. I think you could use vapour barrier plastic or contruction plastic too as they are thicker, but are also a bit pricey and did not have any of those lying around.
 

The Haroo ln

Haroon
Joined
Mar 11, 2025
Messages
296
Points
93
Location
United kingdom
Yes you can start topping the CT but be careful where you top. Top as high as you can. If you top low/too low you risk the leaves getting thicker as the plants natural reaction to topping. If you do top on the lower side i would probably reccomend letting the suckers come out and not breaking them off. Just to keep the leaves thinner. Not sure if it'll work but just a suggestion.
 

WillQuantrill

Well-Known Member
Joined
Aug 21, 2022
Messages
462
Points
93
Location
Missouri
Set up my flue-curing chamber today.

I remove all the electronics for the winter since I store the cabinet outside. After a few test runs, I'll be all set for the first batch of Samsun.
While setting everything up, I realized I had changed my phone since last summer, and all my pre-programmed flue-curing schedules in the Inkbird app are gone. I don't know if there's a way to transfer them, but I completely forgot to check.
Looks like it'll (again) be a PITA to recreate all those programs.

View attachment 60217 View attachment 60218 View attachment 60219 View attachment 60220
Kudos to you, looks like you have quite a few projects going this year and still maintaining good results.
 

Pasiasiainen

Well-Known Member
Joined
Jun 28, 2025
Messages
99
Points
53
Location
Finland
Kudos to you, looks like you have quite a few projects going this year and still maintaining good results.
Thanks! To me one of the best things about this hobby is that it combines building things, electronics and gadgets, gardening, and a bit of kitchen chemistry. If I ever have nothing else to do, there's always something tobacco-related to keep me busy.
 

WillQuantrill

Well-Known Member
Joined
Aug 21, 2022
Messages
462
Points
93
Location
Missouri
Thanks! To me one of the best things about this hobby is that it combines building things, electronics and gadgets, gardening, and a bit of kitchen chemistry. If I ever have nothing else to do, there's always something tobacco-related to keep me busy.
When Im going outside or to the garage my wife asks me what Im going to do. I reply "science". I have an itch in my brain this hobby keeps scratched.
 

Pasiasiainen

Well-Known Member
Joined
Jun 28, 2025
Messages
99
Points
53
Location
Finland
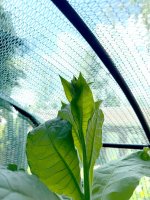
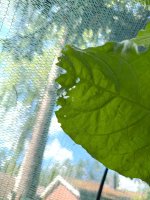
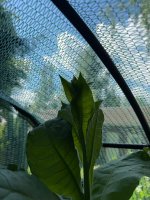
All the plants are now topped. I finally topped my CT Shade when it reached the maximum height my shade structure allows: 240 cm. It was barely buttoning, but I had to top it anyway. I assume it would have grown to almost 3 metres if there had been more room.

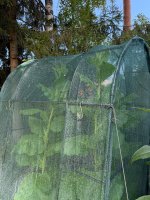
Now that the CTS leaves are growing bigger, I can see a major flaw in my setup. The structure is about 3 × 3 × 2.4 m, but that's simply too small for four plants. Some of the largest middle leaves and upper leaves are rubbing against the coarse plastic netting and getting badly damaged.

CTS-Shade-290726.jpg CTS-barely-buttoning-290726.jpg CTS-Damage-290726.jpg

I'll still end up with plenty of good leaves for my modest needs, and I can probably just trim the damaged parts off some of them.

First flue-curing run with Samsun Maden​


Well... this didn't go well.

I fell into the same trap as last year and picked leaves that weren't all at the same stage of maturity. In fact, I think some of them weren't even mature yet. Fortunately, I only picked the lower-quality bottom leaves, so it's not a huge loss. I also stayed in the yellowing stage for too long, and some of the immature leaves didn't yellow at all – they just turned brown instead. At first I thought about aborting the run, but I decided to see it through anyway. Looks like I'll end up with a pile of brown and brown-green leaves.

You live and learn.

And...

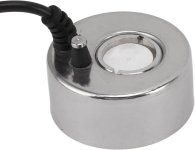
I actually learned something new the other day while setting up this flue-curing run. I use an ultrasonic mist maker in my flue-curing chamber to maintain humidity.

Fogger.jpg

Last year I noticed some white residue on the inside walls - most likely limescale - so I decided to use demineralized water this year.

I filled the water reservoir with demineralized water, put the fogger in, powered it on... and nothing happened. I started wondering if I'd accidentally damaged it somehow. Nope. Tried different power supplies, wiggled the wires. Nothing. Cleaned the fogger. Still nothing. Then I thought maybe the water was too cold, so I filled another container with lukewarm tap water.

Worked like a charm.
Switched back to demineralized water.
Nothing.

Hmmmm...

A quick Google search later, and ta-da! Many ultrasonic foggers use a water level sensor that relies on conductivity (or sometimes capacitance) to detect whether water is present. Demineralized water contains almost no dissolved minerals, so the sensor thinks there's no water at all. I added about 2 dl of tap water to 3 litres of demineralized water, giving it just enough minerals for the sensor to detect something. The fogger immediately started working as expected.

Oh, these weird little gadgets.

 

Attachments

  • CTS-barely-buttoning-290726.jpg
    CTS-barely-buttoning-290726.jpg
    248.3 KB · Views: 2

The Haroo ln

Haroon
Joined
Mar 11, 2025
Messages
296
Points
93
Location
United kingdom
We can only learn lessons from our mistakes and then try to correct them in the future. Hopefully you still get good quality tobacco and good yields from this years crop!
 

WillQuantrill

Well-Known Member
Joined
Aug 21, 2022
Messages
462
Points
93
Location
Missouri
All the plants are now topped. I finally topped my CT Shade when it reached the maximum height my shade structure allows: 240 cm. It was barely buttoning, but I had to top it anyway. I assume it would have grown to almost 3 metres if there had been more room.

Now that the CTS leaves are growing bigger, I can see a major flaw in my setup. The structure is about 3 × 3 × 2.4 m, but that's simply too small for four plants. Some of the largest middle leaves and upper leaves are rubbing against the coarse plastic netting and getting badly damaged.

View attachment 60470 View attachment 60471 View attachment 60472

I'll still end up with plenty of good leaves for my modest needs, and I can probably just trim the damaged parts off some of them.

First flue-curing run with Samsun Maden​


Well... this didn't go well.

I fell into the same trap as last year and picked leaves that weren't all at the same stage of maturity. In fact, I think some of them weren't even mature yet. Fortunately, I only picked the lower-quality bottom leaves, so it's not a huge loss. I also stayed in the yellowing stage for too long, and some of the immature leaves didn't yellow at all – they just turned brown instead. At first I thought about aborting the run, but I decided to see it through anyway. Looks like I'll end up with a pile of brown and brown-green leaves.

You live and learn.

And...

I actually learned something new the other day while setting up this flue-curing run. I use an ultrasonic mist maker in my flue-curing chamber to maintain humidity.

View attachment 60473

Last year I noticed some white residue on the inside walls - most likely limescale - so I decided to use demineralized water this year.

I filled the water reservoir with demineralized water, put the fogger in, powered it on... and nothing happened. I started wondering if I'd accidentally damaged it somehow. Nope. Tried different power supplies, wiggled the wires. Nothing. Cleaned the fogger. Still nothing. Then I thought maybe the water was too cold, so I filled another container with lukewarm tap water.

Worked like a charm.
Switched back to demineralized water.
Nothing.

Hmmmm...

A quick Google search later, and ta-da! Many ultrasonic foggers use a water level sensor that relies on conductivity (or sometimes capacitance) to detect whether water is present. Demineralized water contains almost no dissolved minerals, so the sensor thinks there's no water at all. I added about 2 dl of tap water to 3 litres of demineralized water, giving it just enough minerals for the sensor to detect something. The fogger immediately started working as expected.

Oh, these weird little gadgets.
This is valuable intel. I use a similar humidifier but it works on a "float system" to turn on.
 

Pasiasiainen

Well-Known Member
Joined
Jun 28, 2025
Messages
99
Points
53
Location
Finland
We can only learn lessons from our mistakes and then try to correct them in the future. Hopefully you still get good quality tobacco and good yields from this years crop!
Thanks! I'm still pretty confident I'll end up with more than enough tobacco, and the quality will probably be about what I'd expect at my current skill level. As for the shade structure, it was more of an "Ahh... so that's how it works." moment than an "Aargh... I messed up." :)
 

Pasiasiainen

Well-Known Member
Joined
Jun 28, 2025
Messages
99
Points
53
Location
Finland
I use a similar humidifier but it works on a "float system" to turn on.
Do you happen to have a link to that humidifier? The one I'm using now works well enough, but I have to fiddle with the water level quite a bit to keep it working properly. I don't know if your setup solves that particular problem, but I'd be interested to see what kind of humidifier you're using.
 

WillQuantrill

Well-Known Member
Joined
Aug 21, 2022
Messages
462
Points
93
Location
Missouri

I bought this one because I needed to route the tube through the wall of my kiln so it could be mounted externally. That way I could add water without opening the door and resetting temp and humidity. I did run into an instance I had to tbsht why it wasnt working but I figured out if you fill it without tanking the tank off the water pressure from dumping a gallon in will overfill the ultrasonic chamber and it will just bubble rather than blow mist. My "ahaa" moment.
 

Pasiasiainen

Well-Known Member
Joined
Jun 28, 2025
Messages
99
Points
53
Location
Finland

I bought this one because I needed to route the tube through the wall of my kiln so it could be mounted externally. That way I could add water without opening the door and resetting temp and humidity. I did run into an instance I had to tbsht why it wasnt working but I figured out if you fill it without tanking the tank off the water pressure from dumping a gallon in will overfill the ultrasonic chamber and it will just bubble rather than blow mist. My "ahaa" moment.
Great, thanks for the link. I guess this kind of humidifier is the way to go if I decide to upgrade. I believe @StoneCarver has similar in his kiln.
 

StoneCarver

Bureau for Paranormal Research and Defense
Joined
Aug 26, 2025
Messages
288
Points
93
Location
Winston-Salem,NC
That's very interesting regarding the presence of minerals to provide electrical conductance in the water for your humidifier to work. the directions that came with my humidifier recommended using only distilled water. But it does have a way to detect the presence of water so that it can shut itself off if the water runs out. I have no idea how mine works in that regard.

The drawback I'm finding with using a humidifier is that they do need to be cleaned rather regularly. Mine got mucked up from bacteria a little faster than I'd like but I do have it in my basement. Also, I thought I cleaned it before I used it but perhaps I didn't clean it well enough. I'm thinking about adding a small amount of hydrogen peroxide to the water reservoir to see if that helps reduce bacteria growth. I can't see how that would be a problem but what do I know?

BTW: the directions for mine suggested using distilled white vinegar to clean it. Perhaps that could help with the scaling from having minerals in your water?
 
Top