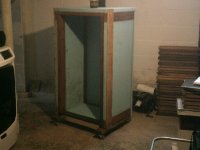
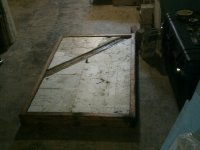
The door is no longer a jar. whew, really finally getting somewhere with this thing.
View attachment 60162
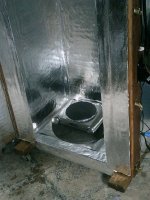
I got a single burner stove to heat the interior. The stove is set on a large grinding disk because the disk can handle high heat. The disk in turn is sitting on a patch of foil insulation which is not glued down. This makes it easy to slide the stove around on the floor to get it in the exact position I want it; it also reduces the damage the grinding disk can cause against the foil insulation that is glued down.
View attachment 60163
I've been test running the stove the past couple days. I started out with the stove on its lowest setting as I didn't want to risk a melt down and fire. I put a smoke detector on top of the stove just in case. The lowest setting on the stove didn't get the kiln up to 125F. So, I kept creeping the heat up till it did. I had planned on using a humidifier to humidify the interior of the kiln but clumsy me dropped it just as I was about to put water in it for its first run. Of course right? Although plastic, the water reservoir shattered when it hit the concrete floor of my basement. There goes that plan. grumble grumble. Ok, backup plan it is. I put five 1cm thick metal rods on the stove and a glass cook pot on top of the metal rods as a makeshift slow cooker. Sitting on the metal rods, the glass won't be in direct contact with the heating surface of the stove. That way, in case the water in the pot evaporates away leaving the cook pot dry, there's less chance of the pot shattering. With the cook pot filled with water on the stove, the humidity in the kiln gets up to 98%. Also, the stove takes much longer to get the kiln up to temperature than without the cook pot and water. I put in an order to buy another humidifier. I'd like tighter control of the humidity than that.
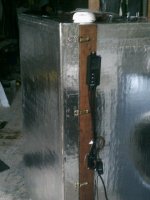
In the top picture, you can see the device I chose to use to monitor and control heat and humidity. It can control two different devices independently. It only has one probe which measures both heat and humidity in the kiln. The device was mainly manufactured for small scale mushroom growing but has wide enough parameters to set that it can be used for a tobacco kiln. Its made by Elitech but I'm not sure its still in manufacture. With using this stove to heat the kiln, the Elitech control device keeps the temperature within 123 to 127F. I think that operational range is acceptable.
I still need to put in the remaining shelf supports in the kiln and a way to keep the tobacco leaves from coming in contact with the walls of the kiln.
Then it ought to be ready for loading with tobacco after thoroughly test running it for a week or so.